
One of the most important things when using AI to generate code is the prompt you give it. A bad prompt can lead to the wrong code being generated and hours spent reprompting or manually investigating and fixing code. A good prompt leads to the correct code being generated with you only needing to review and test.
I’ve been using Ryan Carson’s Cursor rules to help create a clear task list for the features I work on. That task list then forms a series of well-structured prompts you can give to AI to gradually implement the feature step by step. You’re front-loading the work and slowing down the start of the development process to be much faster at the end.
This process works particularly well on large, complex, or unique features that AI will struggle to “one-shot”. It adds structure to the process, allowing you to manually review and test code at appropriate times. The process adds reliability for large features because it’s broken down into small chunks that AI has a good chance of getting right.
An example
I recently used this process to create a person card web component like this:
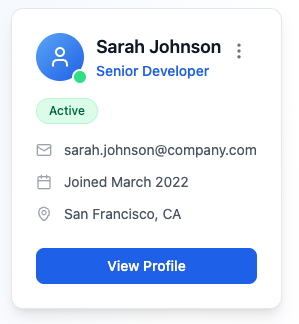
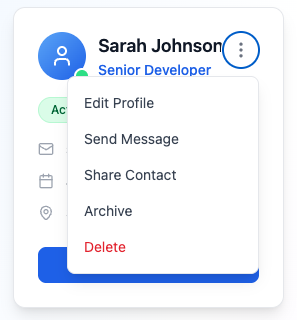
I did try to “one-shot” this including the UI mockups as images, but it didn’t get close. It struggled particularly around keyboard accessibility in the menu. Reprompting made things worse - I ended up spending lots of time without getting very far. I needed a more structured approach.
Adding the Cursor rules
To add Ryan Carson’s Cursor rules to a project, create a .cursor folder in the project root and copy and paste the 3 rules (.mdc files) from the GitHub repository into it. I have the Rule Type set to Manual so that I explicitly need to mention it in a prompt to use it.
Creating the PRD
A PRD is a Product Requirements Document that outlines the functional and non-functional requirements for the person card web component in this case. Creating the PRD is the first step in the process.
You don’t have to write the PRD yourself. AI can do the heavy lifting - you just need to provide a couple of sentences to kick things off using the create-prd Cursor rule. This was my prompt to start the PRD creation process:
using @create-prd.mdc create a PRD for a reusble person card web component.
There are UX mocks of the card in the @ux-mocks folder.
You don’t have to be very specific because AI will ask you questions to firm up the requirements:
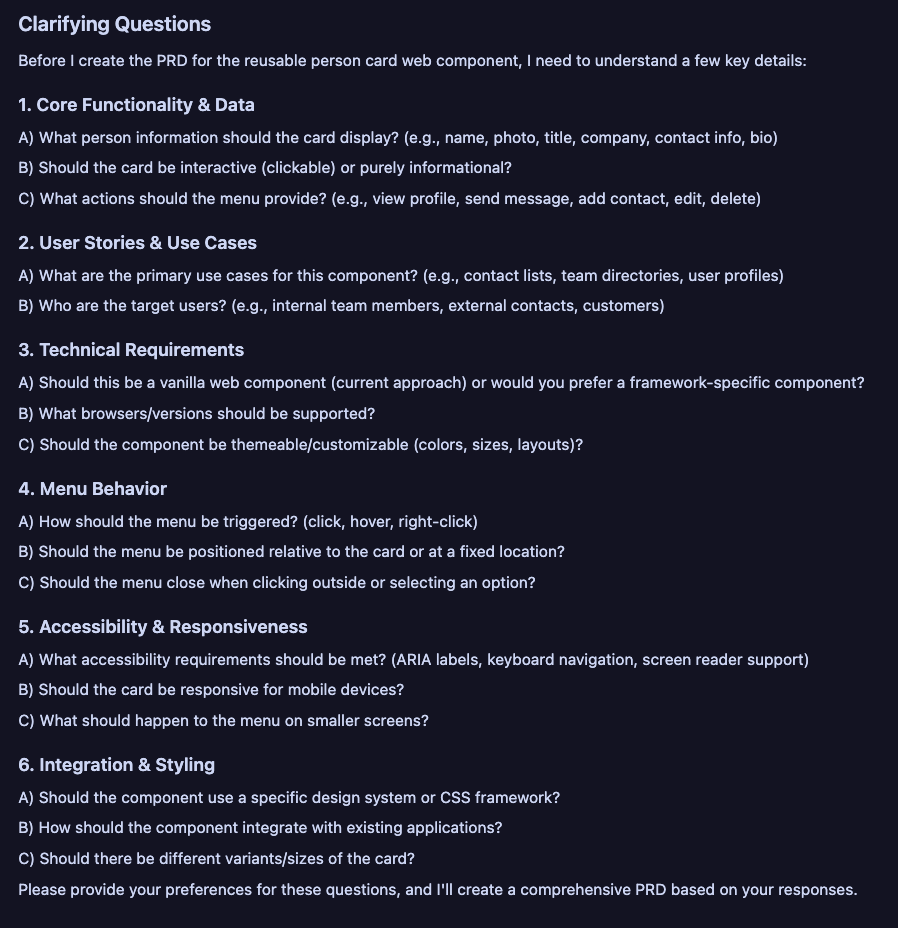
You can reference the question numbers in the reply - here was mine:
1. Name, role, status, email, when joined, location. Card is interactive - view profile button + actions on a menu
2. Some of the uses cases are as you suggest. For internal staff
3. Vanilla web component. All major browsers. Not themable. Fixed size
4. Menu should be triggered using click/Enter and arrow keys should move through menu items. Should be positioned in the card at the top right. Menu should close when click outside or ESC
5. Aria labels, keyboard support, screen reader support
6. Use plain css for styling. No variants. Use shadow dom to isolate styles
AI goes off and creates the PRD in markdown format in the tasks folder.
You can then manually tweak the PRD if necessary or even reprompt AI to make changes. It’s important that the PRD is very clear on what you want done.
I was satisfied with what it generated and ready to move on to the task list generation.
Generating the task list
You then get AI to generate a task list using the generate-tasks Cursor rule.
I did this in a new chat thread. This was my prompt:
Generate tasks for @prd-person-card-component.md using @generate-tasksAI generates tasks and asks whether to generate subtasks. I just typed "go" and it completed the task list, creating a new markdown file in the tasks folder.
You can tweak the task list or ask AI to make changes. I removed tasks around documentation and a showcase page which I didn’t require at this stage. I also wanted to be specific about using Vitest and DOM Testing Library for unit tests.
You can see my task list in the GitHub repository at: https://github.com/carlrip/card-with-menu/blob/main/tasks/tasks-prd-person-card-component.md.
I like having the checkboxes and the task list in the source code so it can be used to track progress. Obviously when the feature is done the task file and PRD can be deleted, but it’s useful to keep them to refer to if there are any future questions.
With a clear task list in place, I was now ready for AI to help me write the code.
Processing tasks
The process-task-list Cursor rule helps implement the code for each task. The rule also tells AI mark complete and move to task next after confirmation from you. Here was my prompt:
Using @process-task-list, start processing tasks-prd-person-card-component.md.
Do only the first subtask and wait for me to review before continuing.
Even though the Cursor rule says “One subtask at a time” I find I need to remind AI of this - hence the second sentence in the prompt. You can also just hit the Stop option in Cursor if you see it doing more than it should be doing.
I find it important to review and test the code after each subtask. The code can be tested before the change is accepted. The code can also be tweaked if necessary - manually or via an AI prompt.
Taking the time to review and test the code after each subtask may seem overkill but it helps catch AI going a little off track and enables you to understand the generated code. There’s an urge to just move on to the next subtask, but resisting this will likely mean you complete the feature more efficiently.
Here are a couple of prompts for changes in the early tasks:
- Use proper private members instead of TS ones
- Use arrow functions to avoid the "this" problem in the WC class
- Use :focus-visible rather than :focus for focus indicators
It’s worth noting that these code preferences can be added to Cursor rules. I don’t write many web components, so I didn’t have anything in place.
Sometimes AI doesn’t mark the subtask as complete but a quick "Mark 1.1 as complete" prompts it to do so.
When I’m ready to move to the next subtask, I prompt "Move to the next subtask" in the same thread, even if you’ve prompted for code changes after the previous subtask.
I generally complete all the subtasks in a single thread and start a new thread for a new task. Here was my prompt to start the 2nd task:
Using @process-task-list, carry on processing tasks-prd-person-card-component.md on task 2 subtask 2.1.
Allow me to review before continuing.
As I move through the tasks, you may find some that are already partially or fully complete. I found this with "Task 2.4 Implement menu item actions by dispatching custom events". AI reworked the code to use an event handler for each menu item rather than a single one. So, I prompted:
The previous implementation is fine - a single event with the option name in the event dataAI agreed and gave the reason (simpler code, consistent API, flexible). This gave me confidence in my judgement.
So, it’s even more important to thoroughly review and test the code through the final steps to avoid unnecessary code being added.
Towards the end of the task list I adjust my task kickoff prompt to the following to get AI to think about the possibility of the task already being completed:
Using @process-task-list, carry on processing tasks-prd-person-card-component.md on task X subtask X.1.
Allow me to review before continuing.
You may find a subtask is already completed, so only make changes if necessary and can make improvements.
AI did make some useful improvements to subtasks that were already partially complete. For example:
- Smooth transitions for focus/hover states
- Using more semantic HTML
- High contrast mode support
- Addition of a component initialised event
Wrap up
Overall, it took me a couple of hours to build the person card component using this approach. The process wasn’t perfect - it did go off track a few times. However, getting it back on track was quick because the iterations are small and very focused.
I’m going to continue to use this process for work that won’t “one-shot”. I’d encourage you to give it a try. Maybe this kind of flow will be a feature built into Cursor one day?
Here’s the link to the GitHub repository containing the generated person card: https://github.com/carlrip/card-with-menu.